
Making ice cream with kids is easy, fun, and safe when you choose simple recipes like no-churn vanilla, fruit-filled sandwiches, or yogurt pops topped with colorful ingredients. Focus on using child-friendly tools, supervised activities, and allergy-aware options to guarantee everyone stays safe. Keep things engaging by decorating cones or creating a sundae bar. If you keep exploring, you’ll discover even more creative and safe ideas for delicious treats everyone will love.
Key Takeaways
- Use no-churn recipes and simple techniques to make safe, creamy ice cream without special equipment.
- Incorporate nutritious fruits and toppings for fun, healthy variations kids will love.
- Supervise children during melting, dipping, and decorating to ensure safety and engagement.
- Offer easy-to-assemble options like fruit-filled sandwiches and yogurt pops for creative treats.
- Use colorful presentation and involving kids in decorating to make ice cream an enjoyable, safe activity.
Classic No-Churn Vanilla Ice Cream

Have you ever wondered how to make smooth, creamy vanilla ice cream without an ice cream maker? It’s simple and fun with a no-churn recipe. First, follow safety tips by ensuring your utensils and storage containers are clean to prevent contamination. When choosing ingredients, feel free to make substitutions—use coconut milk or almond milk if you’re dairy-free, or swap vanilla extract for bean paste for a richer flavor. Always measure ingredients carefully and avoid overmixing to keep the texture perfect. If you’re using sweeteners, honey or maple syrup can be good alternatives to sugar. Keep the mixture cold while freezing, and remember to stir it every 30 minutes during the first few hours to prevent ice crystals. This way, you’ll enjoy delicious homemade vanilla ice cream safely and effortlessly. Incorporating automation technologies can also help streamline the process and reduce preparation time. Additionally, selecting durable, high-quality containers ensures the ice cream remains fresh and prevents freezer burn. Using proper storage techniques can further enhance the ice cream’s texture and flavor over time. Being aware of AI vulnerabilities can help you better understand how to protect your data and devices during your cooking projects or other activities. Moreover, understanding on-device AI capabilities can enhance your experience by enabling smarter, faster responses from your devices while you cook.
Fruit-Filled Ice Cream Sandwiches
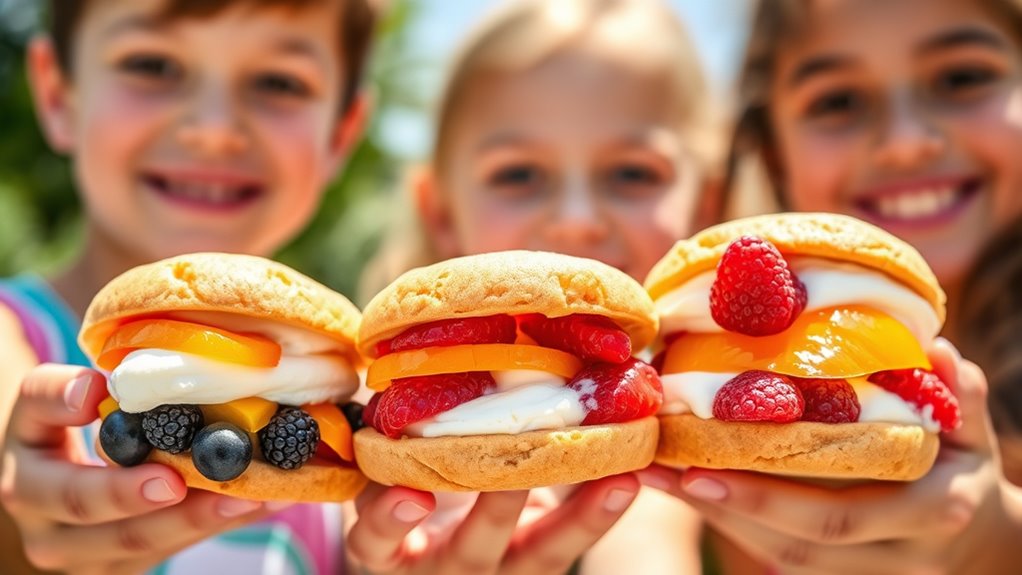
Fruit-filled ice cream sandwiches are a fun way to combine health and flavor. You can choose healthy fruit pairings like berries with vanilla ice cream or peaches with whipped cream. Get creative with sandwich ideas by experimenting with different fruits and cookie options to keep treats exciting. Using healthy ingredients such as fresh fruit not only adds natural sweetness but also boosts the nutritional value of your treats. Incorporating seeds like chia or flaxseeds into your recipes can enhance the nutritional profile while maintaining delightful textures. Additionally, embracing digital creativity can inspire you to design fun, personalized ice cream sandwiches that appeal to kids’ imaginations. Exploring cultural narratives through themed designs can make the experience even more engaging for children and help promote diverse culinary traditions.
Healthy Fruit Pairings
Adding fresh fruit to ice cream sandwiches not only boosts their flavor but also makes them a healthier treat that kids will love. Choosing the right fruit selection is key to maximizing nutritional benefits, such as vitamins, fiber, and antioxidants. Berries like strawberries, blueberries, and raspberries are excellent options—bright in flavor and packed with nutrients. Sliced bananas add natural sweetness and potassium, while peaches or mangoes introduce a juicy, tropical twist. When selecting fruit, opt for ripe, fresh, or frozen varieties without added sugars. Incorporating a colorful mix of fruits enhances visual appeal and offers a variety of health benefits. It’s also important to consider fruit spoilage signs to ensure the fruit used is fresh and safe. These healthy fruit pairings elevate simple ice cream treats into nourishing snacks that satisfy sweet cravings while supporting kids’ growth and well-being.
Creative Sandwich Ideas
Turning healthy fruit pairings into fun, creative ice cream sandwiches opens up a world of delicious possibilities. You can craft visually appealing treats by experimenting with different bread alternatives like rice cakes, cookies, or sliced bananas. For a playful sandwich presentation, layer vibrant fruit slices with your favorite ice cream, then cut into manageable pieces. Use toppings such as sprinkles or crushed nuts for added texture. To make it easier, place the ice cream between two fruit slices or bread alternatives, then gently press to form the sandwich. Here’s a simple guide:
| Fruit | Bread Alternative | Topping |
|---|---|---|
| Strawberries | Rice cakes | Chocolate chips |
| Bananas | Cookies | Shredded coconut |
| Mango | Waffle slices | Crushed nuts |
Incorporating kid-friendly recipes and fun presentation ideas can make these treats even more appealing. These ideas turn simple ingredients into delightful treats your kids will love. Incorporating cozy textiles like blankets or napkins can make serving these treats even more fun and inviting.
Frozen Yogurt Pops With Toppings
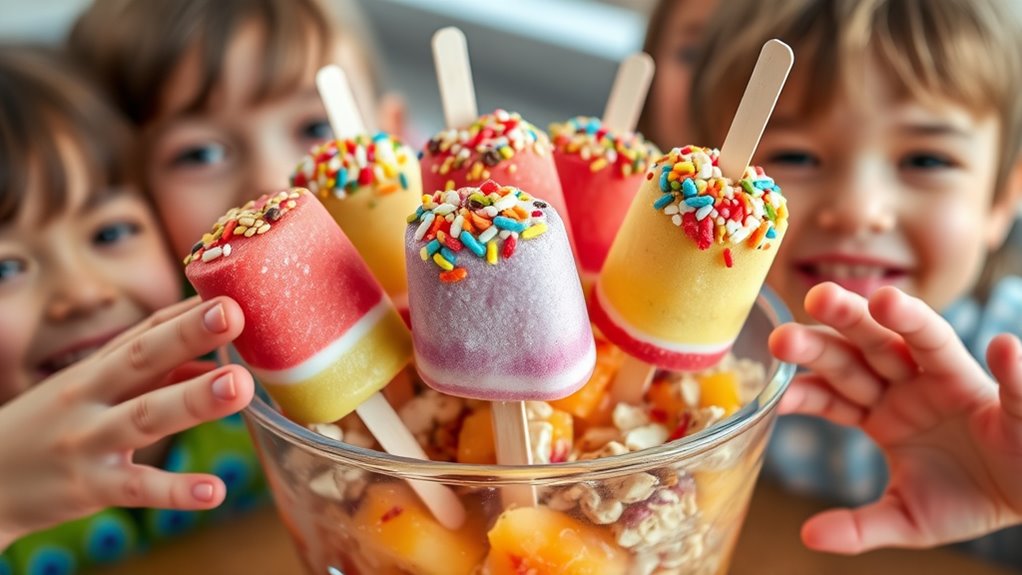
Have you ever wondered how to make frozen yogurt pops even more fun and tasty? Adding toppings is a great way to do that! You can let kids choose their favorites like fresh fruit, sprinkles, or granola. Just remember safety tips: avoid using sticky or hard toppings that could be a choking hazard, and always supervise young children during assembly. Once filled and topped, store the yogurt pops in an airtight container in the freezer to prevent freezer burn. Consider placing a piece of plastic wrap over the top to keep toppings secure. When ready to enjoy, let the pops sit at room temperature for a few minutes to make removal easier. These tips keep the process safe, simple, and super fun for everyone! Incorporating mindfulness techniques can also make the activity more engaging and help children develop focus and patience during the process.
Chocolate-Dipped Banana Bites

Start by picking ripe bananas—they’ll be sweeter and easier to work with. When melting the chocolate, keep it smooth and avoid overheating to prevent clumping. You can get creative with toppings like sprinkles, chopped nuts, or shredded coconut to make each bite special. Incorporating mindfulness into the process can make it more enjoyable and calming for kids. Using keto-friendly ingredients such as sugar-free chocolate can also make this treat suitable for those on a low-carb diet. Being aware of narcissistic behaviors can help parents recognize and manage any manipulative tendencies in children, ensuring a healthier environment. Paying attention to comfort solutions can help create a cozy environment for kids while enjoying their treats. Additionally, selecting air purifiers with HEPA filters can contribute to a cleaner indoor air environment, making your home safer and more comfortable during activities like cooking and baking.
Choosing Ripe Bananas
Choosing the right bananas is key to making delicious chocolate-dipped banana bites. When selecting ripe bananas, understanding the banana ripening stages helps you pick the best ones. Look for bananas with a bright yellow color and few brown spots—these are perfect for biting. Underripe bananas are too firm and lack flavor, while overly ripe ones might be mushy and overly sweet. Use this table to guide your ripe banana selection:
| Ripening Stage | Characteristics |
|---|---|
| Green | Unripe, firm, starchy |
| Yellow | Ripe, slightly firm |
| Yellow with spots | Fully ripe, sweet, soft |
| Mostly brown | Overripe, very soft, sweet |
| Fully brown | Mushy, best for baking |
Choosing bananas at the right stage guarantees your bites are flavorful and easy to dip.
Melting Chocolate Tips
Once you’ve selected the perfect ripe bananas, the next step is melting your chocolate properly to create smooth, glossy coatings. To do this, use gentle heat methods like a double boiler or microwave in short bursts. When melting chocolate, it’s essential to monitor the chocolate temperature closely—aim for about 115°F (46°C) for dark chocolate and slightly lower for milk or white chocolate. Stir frequently to ensure even melting and prevent overheating, which can cause the chocolate to seize or burn. Once melted, the chocolate should be smooth and fluid, making it easy to dip the banana bites. Avoid rushing the process, as improper melting can lead to thick or lumpy coatings that won’t stick well or look appealing. Additionally, understanding melting techniques can help you achieve the perfect consistency every time. For optimal results, controlling the chocolate temperature during melting is crucial to prevent issues like seizing or burning. Incorporating proper temperature control also helps preserve the delicate flavors of the chocolate.
Creative Topping Ideas
To make your chocolate-dipped banana bites even more appealing, try experimenting with a variety of creative toppings. Drizzle them with colorful syrup drizzles for added sweetness and visual appeal. You can also sprinkle sprinkles galore over the chocolate before it hardens, giving each bite a fun, festive look. Crushed nuts or mini chocolate chips are great options for added texture and flavor. For a fruity twist, try adding small pieces of dried fruit or shredded coconut on top. The key is to let your kids’ imagination guide you—whether it’s rainbow sprinkles, edible glitter, or candy bits, the possibilities are endless. Incorporating biodiversity benefits into your snack choices, such as using organic or locally sourced ingredients, can also contribute to supporting sustainable farming practices. Additionally, involving your children in selecting these toppings can enhance their creativity and engagement during snack preparation. These creative toppings make snack time more fun and encourage your little ones to get involved in the kitchen.
Kid-Friendly Ice Cream Sundae Bar
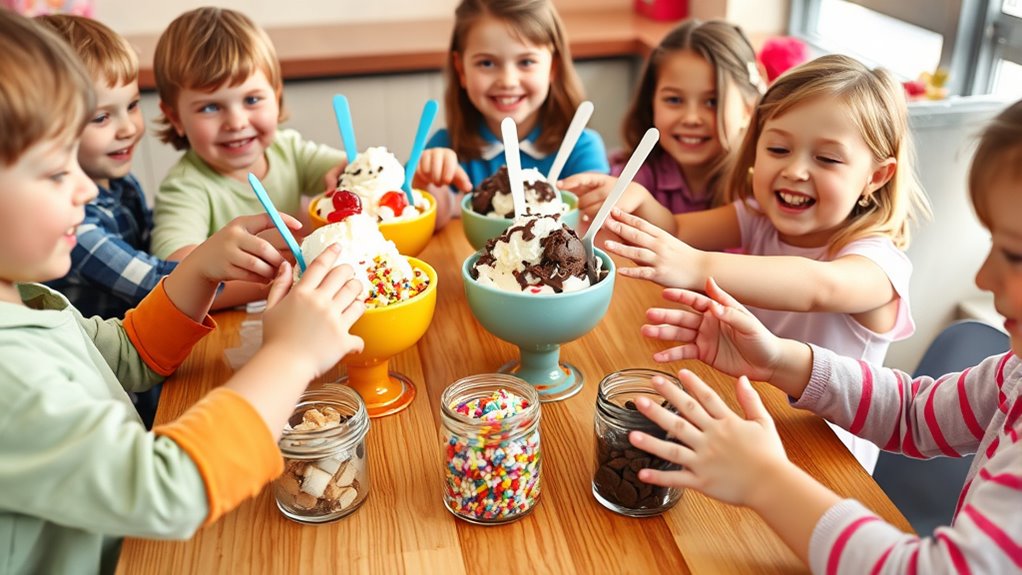
A kid-friendly ice cream sundae bar is a fun way to let children get creative with their dessert. Set up a variety of ice cream flavors, like chocolate, vanilla, and strawberry, so kids can choose their favorites. Use colorful serving utensils, such as small spoons and scoops, to make the experience more engaging. Arrange toppings like sprinkles, whipped cream, and fruit nearby, encouraging kids to customize their sundaes. Keep everything within easy reach and clearly labeled to promote independence. This setup not only makes dessert more interactive but also allows kids to experiment with different combinations. By creating a lively, accessible station, you make dessert time enjoyable and safe for everyone involved.
DIY Ice Cream Cone Decorations

Creating DIY ice cream cone decorations adds a fun and personalized touch to your dessert table. You can transform plain cones into vibrant treats by adding colorful sprinkles around the edges or top. Use a bit of edible glitter to give your cones a sparkling, eye-catching effect that kids will love. To make them, simply dip the top of each cone into a small amount of frosting or melted chocolate, then roll or sprinkle with your chosen decorations. For extra flair, consider mixing different colors of sprinkles or layering glitter for a shimmering look. These customized cones not only look fantastic but also encourage kids to get creative by helping decorate their own. It’s a simple, safe way to make your dessert presentation memorable and full of cheerful color.
Mini Ice Cream Cakes for Celebrations

Looking for a fun and impressive way to serve dessert at celebrations? Mini ice cream cakes are perfect! They’re easy to make and can be customized with your favorite flavors and toppings. Before assembling, make certain safety precautions, like keeping ingredients refrigerated and washing hands thoroughly. Use small, sturdy molds to shape the cakes securely. When serving, slice each mini cake with a clean knife and present them on individual plates. Consider adding fresh fruit or sprinkles as toppings for extra flair. Always supervise kids during assembly and serving to prevent accidents. These mini cakes are a delightful treat that kids will love, and they make any celebration special. Keep it simple, safe, and delicious with these adorable, bite-sized desserts!
Creamy Mango Ice Cream With a Twist

Have you ever wanted to enjoy a tropical, creamy treat that surprises your taste buds? This Creamy Mango Ice Cream With a Twist delivers exactly that, blending the sweet mango flavor with a fun, unexpected element. To make it special, consider these three enhancements:
- Add a splash of lime juice for a tangy, citrusy kick that enhances the tropical twist.
- Incorporate shredded coconut for extra texture and a coconut-mango flavor combo.
- Mix in small chunks of fresh mango or pineapple for added freshness and visual appeal.
This recipe is simple, kid-friendly, and perfect for summer days. The mango flavor provides a smooth, fruity base, while the twist keeps everyone excited for each spoonful. Enjoy creating this delicious treat together!
Easy Rainbow Sherbet in a Jar
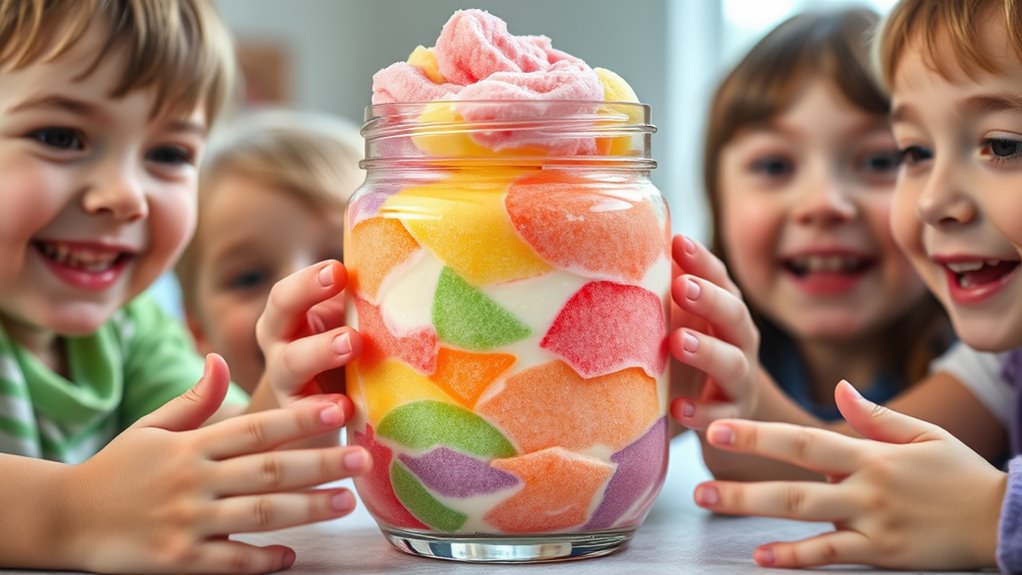
Nothing beats the fun of making your own colorful rainbow sherbet in a jar, especially when it’s quick and easy. Start by blending your favorite fruity flavors, then pour the mixture into small jars. Once chilled, add a scoop of the sherbet to each jar. Now, make it festive with colorful sprinkles and fun toppings like mini marshmallows or fruit slices. These bright additions not only make the dessert more appealing but also encourage kids to enjoy their treat. For extra fun, let kids choose their own toppings and sprinkle them on top. The vibrant colors and playful decorations turn a simple treat into a delightful activity. With minimal effort, you create a invigorating, eye-catching dessert that kids will love to eat and share.
Whipped Cream and Cookie Ice Cream Cups

When making whipped cream and cookie ice cream cups, simple assembly tips can make the process easier and more fun. Choose safe, kid-friendly ingredients to guarantee everyone can enjoy the treats without worries. Keeping things straightforward helps you focus on the joy of creating delicious, personalized ice cream cups with your kids.
Simple Assembly Tips
Wondering how to make your ice cream treats look as delicious as they taste? Here are simple assembly tips to elevate your whipped cream and cookie ice cream cups. First, layer ingredients carefully to prevent messes and create a neat presentation. Second, consider ingredient substitutions, like dairy-free whipped cream or gluten-free cookies, to accommodate dietary needs. Third, after assembling, store your treats in an airtight container and keep them in the freezer to preserve freshness. Using proper storage tips guarantees your treats stay delicious until serving. When adding whipped cream, use a piping bag for a clean, professional look. Remember, precision and thoughtful substitutions make your creations both attractive and inclusive, making your ice cream experience even more enjoyable.
Safe Ingredient Choices
Choosing safe ingredients for your ice cream cups guarantees everyone can enjoy the treats without worries. When selecting whipped cream, consider dairy alternatives like coconut or soy-based options if someone has a dairy allergy or lactose intolerance. Always check labels for allergen considerations to ensure no cross-contamination or hidden ingredients. For cookie cups, choose allergy-friendly cookies made without nuts, gluten, or other common allergens if needed. Opt for simple, natural ingredients to reduce potential reactions. Using allergen-aware products not only keeps kids safe but also teaches them about mindful eating. Remember to read labels carefully and ask about ingredient lists when buying pre-made toppings or cookies. This way, your fun ice cream activity stays safe and inclusive for everyone.
Frequently Asked Questions
Are These Ice Cream Recipes Suitable for Children With Allergies?
When considering allergy-friendly options, you should check each recipe carefully for common allergens. Many recipes can be adapted with gluten-free modifications or dairy-free alternatives to suit children with allergies. Always read labels and substitute ingredients to guarantee safety. If you’re unsure, consult with a healthcare professional or allergist. By making these adjustments, you can create delicious, safe ice cream treats that everyone can enjoy comfortably.
How Can I Make These Recipes Dairy-Free or Vegan?
Think of your ice cream as a blank canvas waiting for vibrant, allergy-friendly colors. You can easily replace dairy with plant-based options like coconut, almond, or cashew milk, which serve as perfect dairy alternatives. For vegan substitutions, use natural sweeteners and plant-based fats to create creamy textures. These choices guarantee everyone can enjoy a delicious, safe treat—turning your dessert into a symbol of kindness and inclusivity.
What Safety Tips Should I Follow When Involving Kids in Ice Cream Making?
When involving kids in ice cream making, you should prioritize kitchen safety by always supervising them closely. Keep sharp utensils and hot appliances out of reach, and teach children about proper handling of equipment. Make sure they wash their hands before starting, and stay nearby to guide them through each step. Child supervision is key to preventing accidents and making the experience fun, safe, and memorable for everyone.
Can These Recipes Be Prepared Ahead of Time for Parties?
You might worry that preparing ice cream ahead of time affects its quality, but with make ahead preparations, you can keep it just as tasty. For party serving tips, store the ice cream properly in an airtight container and serve it straight from the freezer. This way, your treats stay fresh, and you save time during the celebration. Preparing in advance makes hosting easier and guarantees everyone gets to enjoy delicious, safely served ice cream.
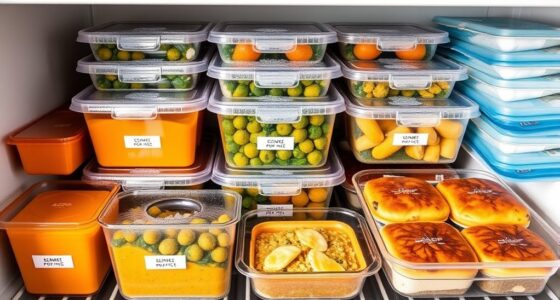
How Do I Store Homemade Ice Cream to Keep It Fresh and Safe?
You should use proper freezing techniques and storage containers to keep your homemade ice cream fresh and safe. Transfer your ice cream into airtight containers, leaving some space for expansion, and seal them tightly. Store it in the coldest part of your freezer to prevent temperature fluctuations. Remember, good freezing techniques and quality storage containers guarantee your ice cream stays delicious and safe to enjoy later.
Conclusion
Now you’re ready to turn any sunny day into an unforgettable ice cream adventure! With these simple, fun, and safe recipes, you’ll keep kids smiling and cool all season long. Whether it’s a quick treat or a festive celebration, these ideas make flavor and joy explode like fireworks in their mouths. So grab your ingredients, get creative, and watch your little ones’ faces light up brighter than a summer sunset!