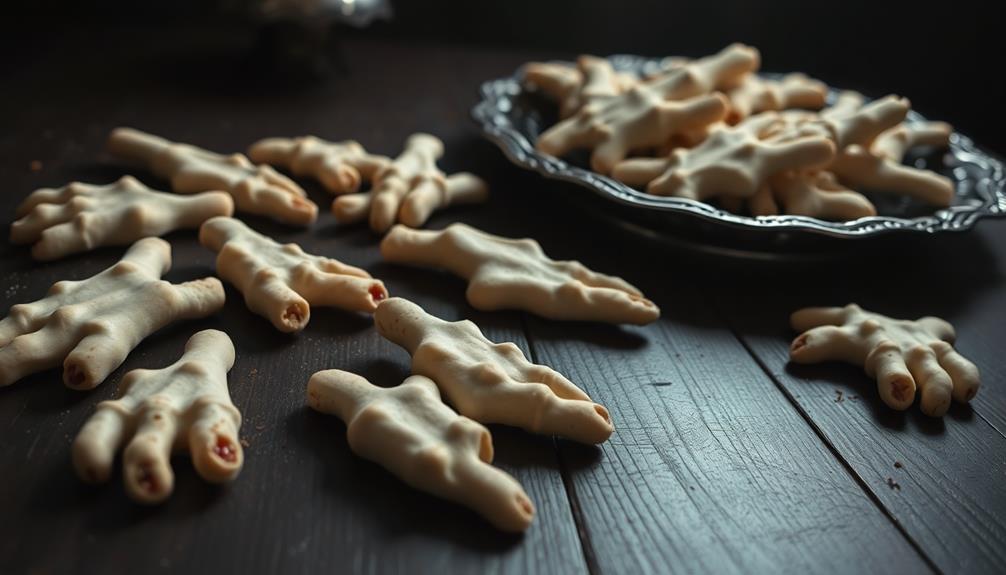

Witch's Finger Cookies are a creepy yet delicious Halloween treat that you'll love making and serving. These shortbread-like cookies are shaped to resemble long, bony fingers with almond "fingernails," creating a spooky visual effect. They've gained popularity since the late 20th century, inspired by medieval culinary creations. You'll find them easy to make, with a recipe that includes butter, sugar, egg, flour, and almonds. The fun part is shaping the dough into fingers and adding knuckle details. You can even customize them with food coloring for extra eeriness. There's more to discover about these ghoulish goodies that'll make your Halloween gathering unforgettable.
Key Takeaways
- Witch's Finger Cookies are Halloween-themed treats designed to resemble long, bony fingers with almond "fingernails."
- The recipe features a buttery shortbread-like texture and a subtle almond flavor, making them both tasty and visually striking.
- Key ingredients include butter, sugar, egg, flour, and almonds, with optional food coloring for enhanced spooky appearance.
- The cooking process involves creaming butter and sugar, mixing dry ingredients, shaping the dough, and baking at 350°F (175°C).
- These cookies can be customized in length, knuckle definition, and color, making them a fun and creative Halloween baking project.
Halloween witch's finger cookie cutters
As an affiliate, we earn on qualifying purchases.
As an affiliate, we earn on qualifying purchases.
History
While the exact origins of witch's finger cookies remain shrouded in mystery, they've been a popular Halloween treat for decades. You'll find that these spooky confections gained widespread popularity in the late 20th century, as Halloween celebrations became more elaborate and commercialized.
The concept of creating food that resembles body parts isn't new, though. Throughout history, you'll discover examples of culinary creations designed to shock and amuse. In medieval times, European cooks often crafted elaborate "subtleties" – decorative dishes meant to entertain guests at banquets. These sometimes included edible representations of human body parts.
When it comes to witch's finger cookies specifically, you can trace their inspiration to the broader trend of Halloween-themed baking that emerged in the 1960s and '70s. As trick-or-treating became more popular, home bakers began experimenting with creepy designs to delight children and adults alike.
The witch's finger cookie, with its almond fingernail and knuckle wrinkles, perfectly captured the playful yet macabre spirit of the holiday. Today, you'll find countless variations of this classic treat, each adding its own twist to the eerie design.

Amazon Brand – Happy Belly Sliced Almond, 6 ounce (Pack of 1)
One 6-ounce bag of Happy Belly Sliced Almonds
As an affiliate, we earn on qualifying purchases.
As an affiliate, we earn on qualifying purchases.
Recipe

Witch's Finger Cookies are a spooky and delicious Halloween treat that's sure to delight both children and adults alike. These eerie-looking cookies are shaped to resemble long, bony fingers, complete with almond "fingernails" and knuckle indentations. They're not only visually striking but also wonderfully tasty, with a buttery shortbread-like texture and a subtle almond flavor.
While they may look complicated, these cookies are surprisingly easy to make. The dough comes together quickly, and shaping the fingers is a fun, creative process that can be enjoyed by the whole family. You can customize the appearance of your witch's fingers by adjusting the length, adding more pronounced knuckles, or even incorporating food coloring for a ghastly green or sickly pale hue.
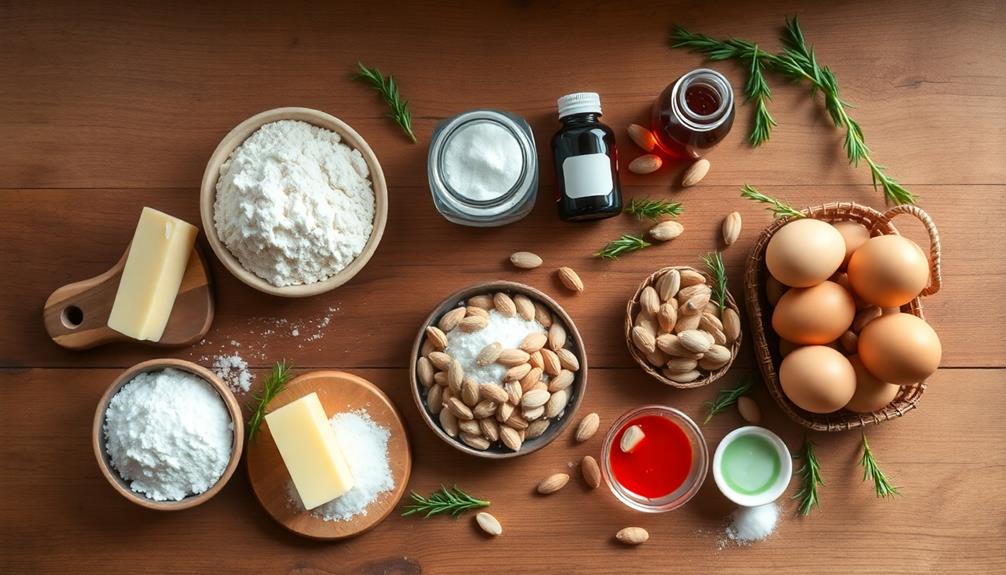
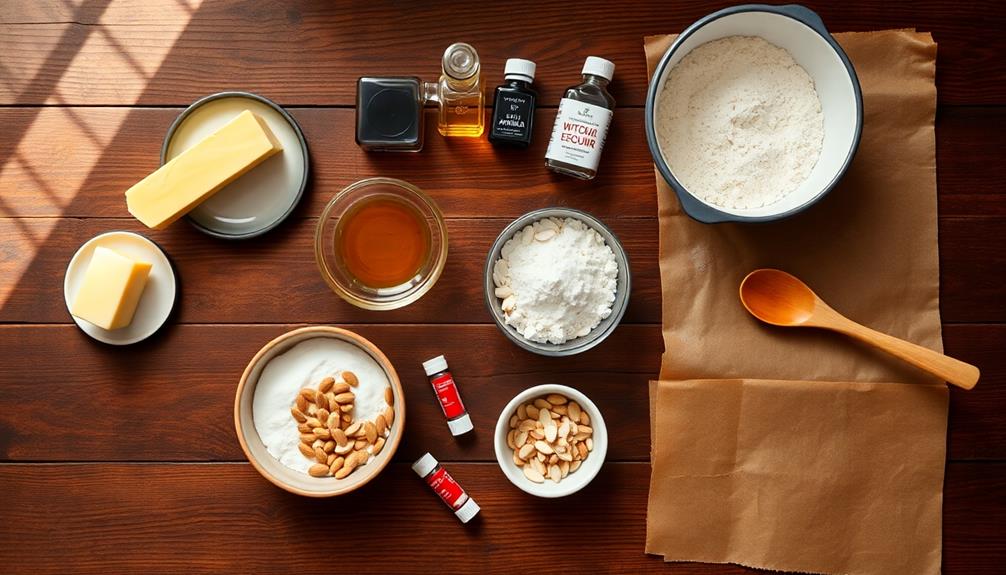
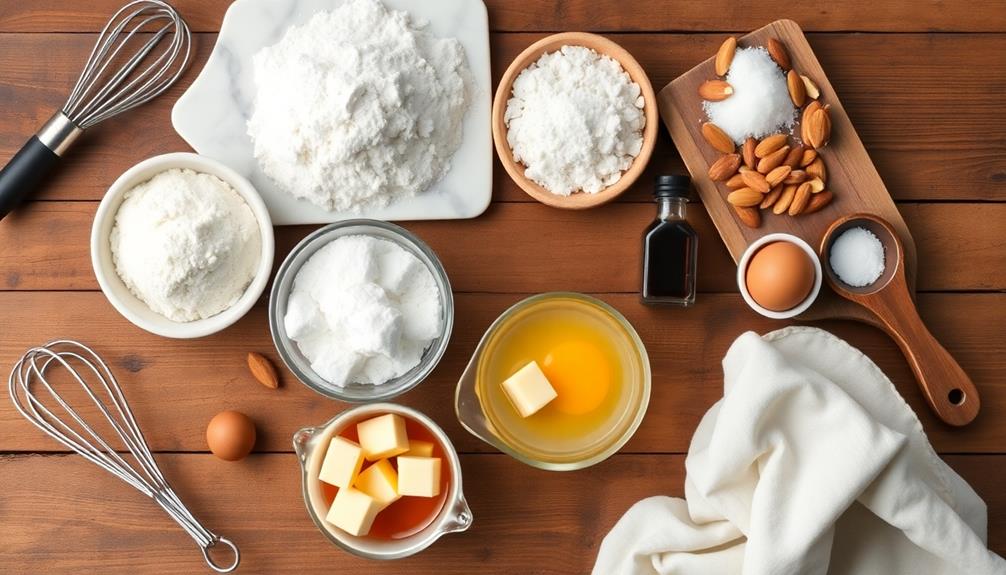
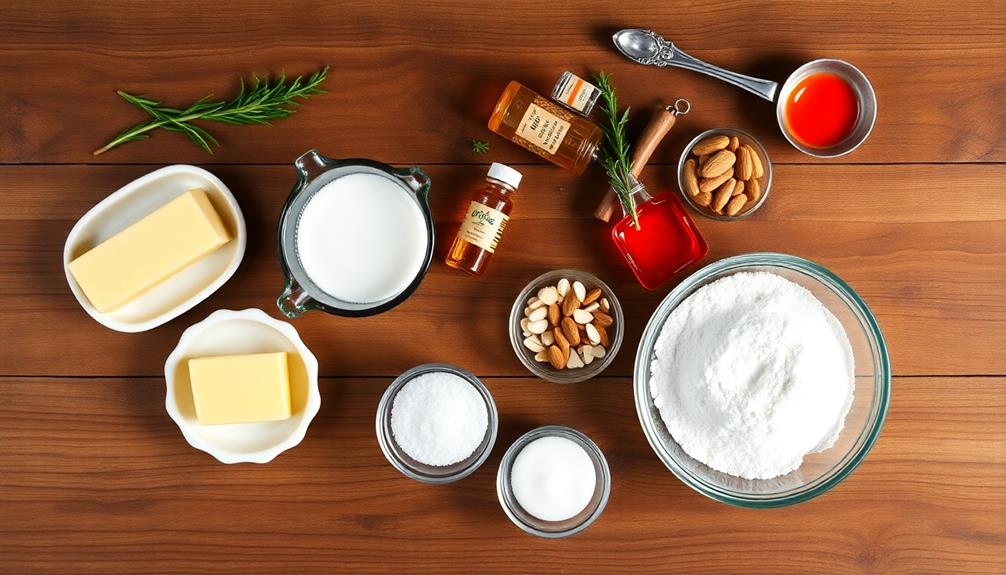
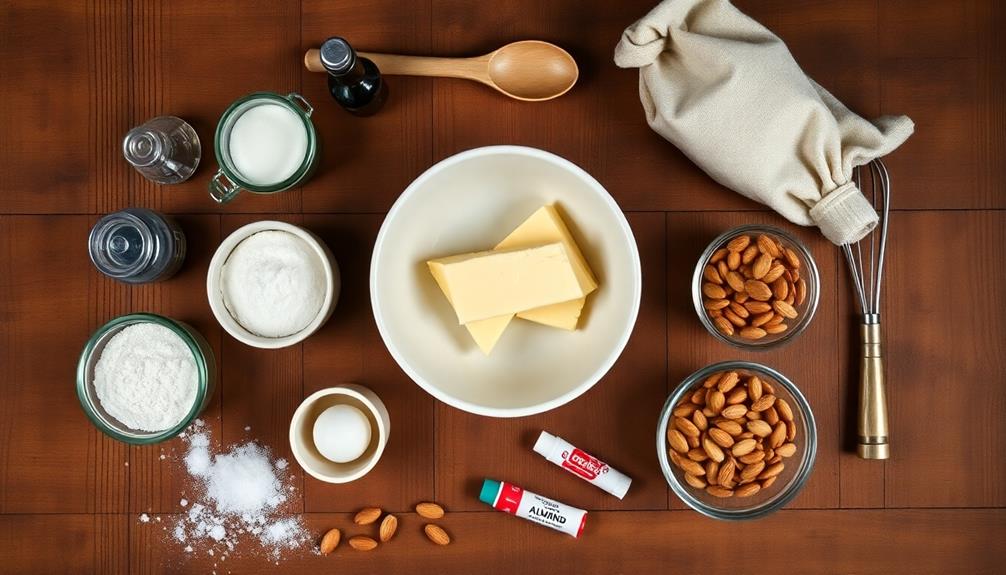
- 1 cup unsalted butter, softened
- 1 cup powdered sugar
- 1 large egg
- 1 teaspoon vanilla extract
- 1 teaspoon almond extract
- 2 3/4 cups all-purpose flour
- 1 teaspoon salt
- 1/4 cup sliced almonds
- Red gel food coloring (optional)
To make the cookies, cream the butter and sugar together until light and fluffy. Beat in the egg and extracts. Gradually mix in the flour and salt until a soft dough forms.
Divide the dough into 4 parts and shape each part into finger-like logs. Score knuckle marks with a knife and press an almond slice onto one end for the fingernail. Chill the shaped cookies for 30 minutes, then bake at 325°F (165°C) for 20-25 minutes until lightly golden. Let cool completely before adding any "bloody" details with red gel food coloring, if desired.
For best results, make sure your butter is at room temperature before starting. This will ensure it creams properly with the sugar, resulting in a lighter texture.
If you want to enhance the spooky effect, you can add a drop of green food coloring to the dough for a sickly hue. Don't overbake the cookies, as they should remain pale for that authentic "dead finger" look.
For a finishing touch, you can dust the cooled cookies with a bit of cocoa powder or cinnamon to give them an aged, dirty appearance.
food coloring for cookies
As an affiliate, we earn on qualifying purchases.
As an affiliate, we earn on qualifying purchases.
Cooking Steps
You'll begin your witch's finger cookie adventure by preheating your oven to 350°F and mixing the dry ingredients together in a bowl.
Next, you'll cream the butter and sugar until fluffy, then add the eggs and vanilla extract, making sure to mix well.
If you're feeling extra spooky, you can add a few drops of green food coloring to give your witch fingers an eerie hue.
Step 1. Preheat Oven to 350°F
Before diving into the dough preparation, preheat your oven to 350°F (175°C). This crucial step ensures your witch's finger cookies will bake evenly and achieve the perfect texture.
While your oven's heating up, it's an excellent time to gather your ingredients and equipment.
Here's why preheating is so important:
- It creates a consistent baking environment
- It helps your cookies rise properly
- It ensures even browning and crispiness
Most modern ovens take about 15-20 minutes to reach 350°F, but older models might need up to 30 minutes. If you have an oven thermometer, use it to double-check the temperature accuracy. Some ovens can be off by as much as 50 degrees!
While waiting, line your baking sheets with parchment paper or silicone mats. This prevents sticking and makes cleanup a breeze.
If you're using dark-colored baking sheets, you might want to reduce the oven temperature by 25°F to prevent over-browning.
Step 2. Mix Dry Ingredients Together
The recipe's foundation begins with mixing the dry ingredients. You'll need to gather your all-purpose flour, powdered sugar, and salt.
In a medium-sized mixing bowl, combine 2 1/4 cups of flour, 3/4 cup of powdered sugar, and 1/4 teaspoon of salt. Using a whisk or a fork, blend these ingredients thoroughly to ensure even distribution.
As you're mixing, keep in mind that proper incorporation of the dry ingredients is crucial for the texture of your witch's finger cookies. The flour provides structure, while the powdered sugar adds sweetness and contributes to a melt-in-your-mouth consistency.
The salt, though minimal, enhances the overall flavor profile.
Once you've mixed the dry ingredients, you'll notice a uniform, pale mixture. This homogeneous blend will serve as the base for your dough, ready to be combined with the wet ingredients in the next step.
Step 3. Cream Butter and Sugar
With the dry ingredients ready, it's time to focus on the wet components. Creaming butter and sugar is a crucial step in making Witch's Finger Cookies, as it creates a light and fluffy base for your dough.
Start by taking your butter out of the refrigerator about 30 minutes before you begin. You'll want it to be softened but not melted.
In a large mixing bowl, combine the softened butter with granulated sugar. Using an electric mixer on medium speed, beat the mixture for about 3-5 minutes until it's pale and creamy.
As you're creaming, you'll notice the mixture becoming lighter in color and increasing in volume. This process incorporates air into the batter, which will help your cookies achieve the perfect texture.
Don't rush this step – proper creaming is essential for creating those delightfully crisp yet tender witch fingers.
Once your butter and sugar mixture is light and fluffy, you're ready to move on to the next step. Remember, patience is key when creaming, as it sets the foundation for your spooky treats.
Step 4. Add Eggs and Vanilla Extract

Now that you've creamed the butter and sugar to perfection, it's time to incorporate the eggs and vanilla extract. This step is crucial for achieving the right consistency and flavor in your witch's finger cookies. Here's what you need to do:
- Crack two large eggs into a small bowl, checking for any shell fragments.
- Add the eggs one at a time to your butter-sugar mixture, beating well after each addition.
- Scrape down the sides of the bowl with a rubber spatula to ensure everything's well combined.
- Measure out 1 teaspoon of pure vanilla extract.
- Pour the vanilla into the bowl and mix thoroughly.
As you're adding these wet ingredients, you'll notice the mixture becoming smoother and more cohesive. The eggs provide structure and binding, while the vanilla extract adds depth to the flavor profile.
Don't worry if the batter looks a bit curdled at first – it'll come together as you mix. Remember, overmixing can lead to tough cookies, so stop once everything's well incorporated.
You're now ready to move on to the next exciting step in creating your spooky witch's finger cookies!
Step 5. Add Food Coloring if Desired
For an extra spooky touch, you might want to add some food coloring to your witch's finger cookies. This step is entirely optional, but it can really enhance the eerie appearance of your treats.
If you decide to use food coloring, you'll want to add it now, after incorporating the eggs and vanilla extract.
Here's how to add food coloring to your cookie dough:
- Choose your color: Green is a popular choice for witch-themed treats, but you can also use purple, black, or even a combination of colors.
- Start small: Add just a few drops of food coloring at first. You can always add more later if needed.
- Mix thoroughly: Use a spatula or your mixer to incorporate the color evenly throughout the dough.
- Adjust as needed: If the color isn't intense enough, gradually add more drops until you achieve your desired shade.
shortbread cookie baking tools
As an affiliate, we earn on qualifying purchases.
As an affiliate, we earn on qualifying purchases.
Final Thoughts
These Witch's Finger Cookies are sure to be a hit at your next Halloween party or spooky gathering. They're not only deliciously creepy but also incredibly fun to make. As you've seen, the process is straightforward, allowing you to unleash your creativity with various decorations and flavors.
Remember, practice makes perfect when it comes to shaping the fingers. Don't worry if your first batch isn't picture-perfect; they'll still taste great and add to the eerie atmosphere. You can experiment with different food colorings, add spices like cinnamon or nutmeg for extra flavor, or even incorporate crushed nuts for texture.
Store your finished cookies in an airtight container at room temperature for up to a week. If you're planning ahead, you can freeze the unbaked dough for up to three months. Just thaw it in the refrigerator overnight before shaping and baking.
Lastly, don't forget to have fun with the presentation. Arrange your Witch's Finger Cookies on a spooky platter or serve them alongside other Halloween-themed treats for maximum impact. Your guests will be both impressed and spooked by your culinary creativity!
Frequently Asked Questions
Can Witch's Finger Cookies Be Made Gluten-Free?
Yes, you can make gluten-free witch's finger cookies. You'll need to substitute regular flour with gluten-free alternatives like almond flour, rice flour, or a gluten-free all-purpose blend. Don't forget to adjust other ingredients accordingly for the best results.
How Long Do Witch's Finger Cookies Stay Fresh?
You'll find they stay fresh for about a week when stored properly. Keep them in an airtight container at room temperature. If you want to extend their freshness, you can freeze them for up to three months.
Are There Variations of Witch's Finger Cookies for Different Holidays?
You'll find many variations of finger-shaped cookies for different holidays. You can make Santa's fingers for Christmas, zombie fingers for Halloween, or even bunny fingers for Easter. Get creative with colors and decorations to suit each occasion!
Can the Dough Be Prepared in Advance and Frozen?
Yes, you can prepare the dough in advance and freeze it. You'll save time by making a big batch. Just wrap it tightly in plastic wrap and freeze for up to 3 months. Thaw before shaping and baking.
What Are Some Creative Serving Ideas for Witch's Finger Cookies?
You'll impress guests by serving these spooky treats on a platter with fake blood dip. Arrange them in a skeletal hand shape, or place them in a glass jar labeled "Specimen Collection." Don't forget eerie lighting for atmosphere!