
TL;DR
Moving your rig into a closet or another room is often more effective than buying foam. Proper placement, ventilation, and door sealing are key. Small spaces can build low-frequency issues, so treatment should target reflections and corners for clear sound.
If you want silence from your high-powered AI rig, stuffing it with foam isn’t enough. The real secret is where you put it. Moving your machine out of your workspace into a closet or another room can cut noise dramatically—sometimes by over 30 decibels—without much fuss.
This article reveals the truth about acoustic dampening, placement tricks, and the one setup that often beats expensive soundproofing. Whether you’re building a dedicated rig or just trying to keep your workspace peaceful, understanding these techniques can transform your setup—and your sanity.
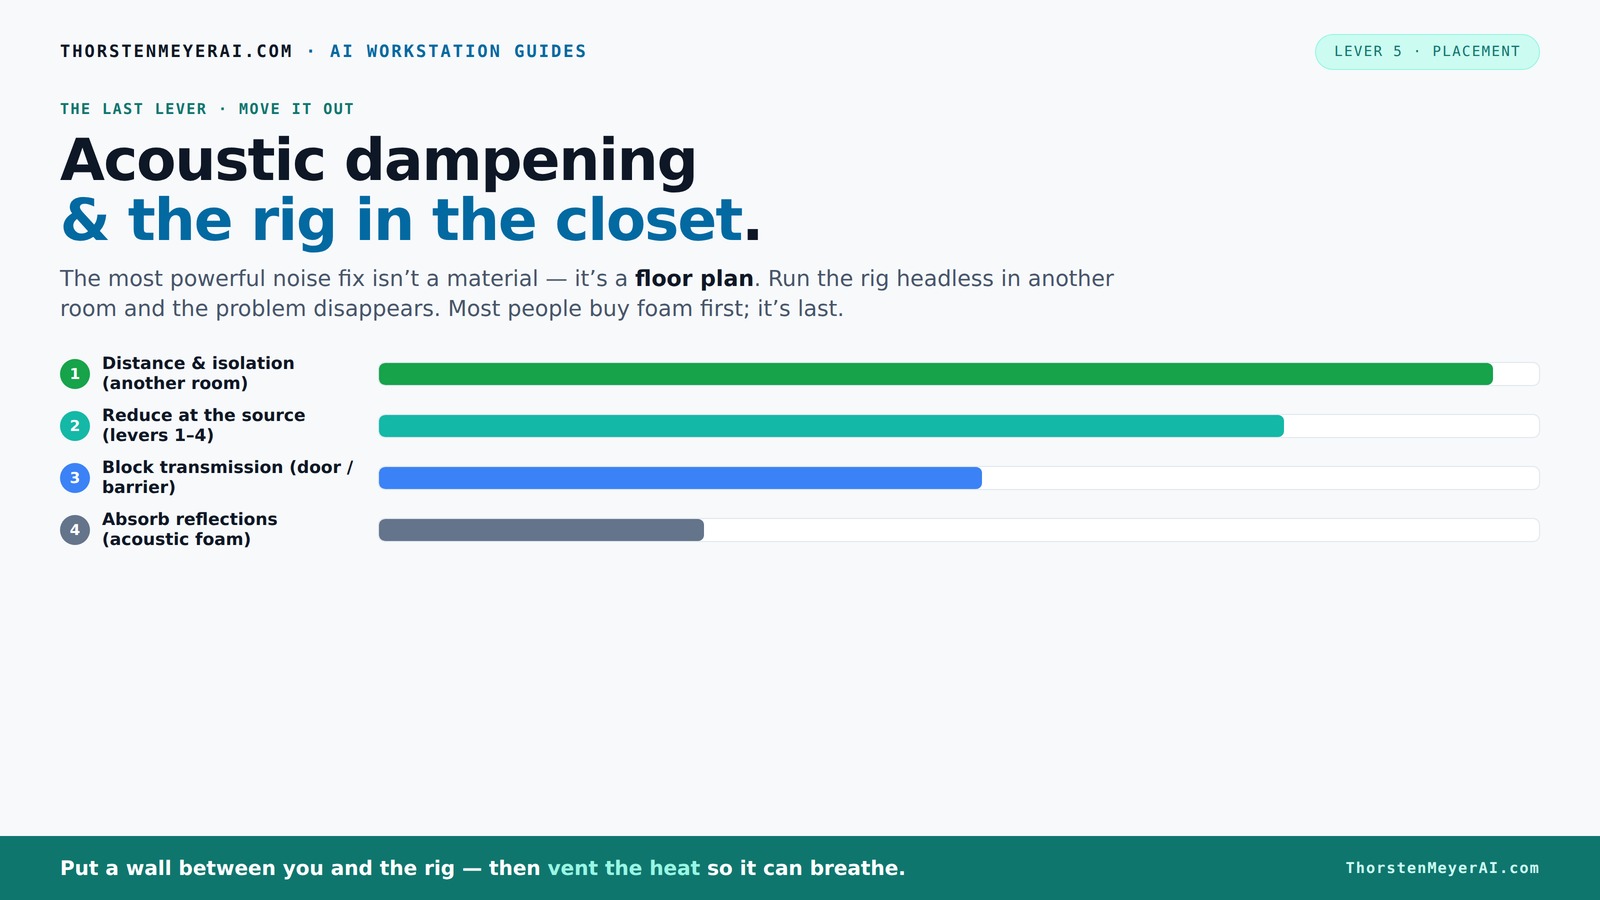
Acoustic dampening
& the rig in the closet.
The most powerful noise fix isn’t a material — it’s a floor plan. A rig you can’t hear because it’s in another room beats any amount of foam. Tap the approaches in Part 1 to see what actually works.
(another room)
(levers 1–4)
(door / barrier)
(acoustic foam)
Contain the noise, not the heat
Key Takeaways
- Moving your rig into a different room or closet is often the most effective way to eliminate noise.
- Proper ventilation is critical—sealed closets trap heat, risking hardware damage and noise from throttling.
- Placement of your hardware and acoustic treatment points matters more than just adding foam.
- Sealing gaps and covering doors with blankets or soundproof curtains reduces leaks and reflections.
- Controlling low frequencies with bass traps in corners prevents muddy, boomy sound in small spaces.
As an affiliate, we earn on qualifying purchases.
Why Moving It Beats Adding Foam Every Time
Acoustic dampening is about controlling how sound travels, not just absorbing echoes. Moving your rig into another room or closet means you’re removing the source from your ears entirely. It’s the simplest, most effective fix. When your machine roars in a different space, your desk stays silent.
Think of it like a noisy neighbor: if they’re in your yard, you hear every bark. If they’re across town, you don’t. For AI rigs, this means placing the hardware behind a wall or in a closet, then accessing it over the network. It’s a game-changer for noise management.
Two key points: a wired connection is a must, and ventilation can’t be ignored. Otherwise, trapped heat will cook your hardware, and you’ll end up with throttling and loud fans, defeating the whole purpose.
The 'Rig in the Closet' Setup — The One Big Caveat You Must Know
Putting a hot, high-load machine in a closet sounds perfect—quiet, out of sight. But there’s a catch: heat. A sealed closet traps warm air, causing temperatures to soar. A GPU running 600W continuously in a sealed space will heat up the environment, leading to throttling and fan noise.
To avoid this, your closet needs ventilation. Passive vents, exhaust fans, or ducted airflow are essential. Some folks even opt for custom soundproof cabinets with built-in cooling—these combine absorption with temperature control, keeping things quiet and cool.
In practice, you can make a closet work by installing a small exhaust fan, sealing gaps around the door with weatherstripping, and ensuring fresh air flows in. This way, you keep your hardware happy without turning your closet into a furnace.
Placement Tips: How to Position Your Closet Rig for Best Sound Control
Placement is everything. In a tiny closet, the way you position your hardware impacts reflection and low-frequency buildup. For example, placing your rig right against the back wall can cause sound waves to bounce and create boomy, muddy bass—especially if walls are parallel.
Use these tips to optimize your setup:
- Keep the rig off the wall—use rubber feet or a stand.
- Place the microphone as far from the walls as possible, ideally in the middle of the space.
- Position absorbing materials at reflection points, like the wall behind the mic and ceiling.
- Use angled or irregular surfaces to scatter sound waves, reducing standing waves.
Real-world scenario: A YouTuber placed foam panels in all corners and mounted the microphone on a boom arm in the middle of a closet, drastically reducing echoes and muddiness.
The Door and Walls: Seal and Absorb Your Weak Points
Doors and gaps are the biggest leaks for sound. In a closet, the door often lets in noise and creates reflections. Sealing cracks with weatherstripping or acoustic sealant is a must. Covering the door with blankets or acoustic curtains further reduces leakage and reflections.
Walls should also be treated—covering them with absorption panels or thick blankets helps diminish echoes. Focus on the reflection points—think of it as directing sound waves away from your microphone and ears.
For example, a DIY setup used layered blankets on the door and foam panels on the walls, creating a surprisingly effective vocal booth in a tiny closet.
Materials That Make a Difference — Foam, Blankets, and Bass Traps
Not all materials are created equal. Thin foam panels are good at absorbing high frequencies and reducing echo, but they don’t tackle low-end rumble. Thick, dense panels and bass traps are better for controlling low frequencies and standing waves.
Blankets and rugs are surprisingly effective too—layered blankets with an air gap from the wall make a big difference for reflections. Rugs on the floor dampen bounce from hard surfaces, especially in small rooms.
In a typical DIY closet booth, combining foam panels on the ceiling and walls with thick blankets on the door and floor creates a balanced sound environment.
Taming Low-End Buildup and Echo in Small Closets
Small rooms tend to boost bass frequencies, leading to boxiness and muddiness. The key is to add bass traps in corners where low frequencies tend to build up. These traps absorb the boom, making the sound clearer.
Use soft materials like thick blankets or specialized bass traps to treat corners. Also, avoid parallel walls—angle them or add irregular surfaces. A rug or foam on the floor helps too.
Real-world example: A streamer installed DIY bass traps in the closet corners, reducing low-end muddiness by over 50%, making vocals much clearer.
Your Practical Closet Booth Setup Checklist
Here's a quick checklist to build a quiet, effective closet rig:
- Choose a closet or room with minimal outside noise.
- Seal all gaps around the door with weatherstripping or acoustic sealant.
- Install a quiet exhaust fan or ventilation system.
- Place your rig on rubber feet or a stand, away from walls.
- Use absorption panels on walls and ceiling, focusing on reflection points.
- Add blankets or rugs to the door and floor.
- Install bass traps in corners for low-end control.
- Ensure a stable, wired network connection for remote access.
This setup balances noise reduction, cooling, and reflection control, turning your closet into a quiet, productive space.
Conclusion
Quieting a high-powered rig isn’t just about buying foam. It’s about smart placement, sealing off leaks, and managing heat. When you set up a closet rig with these principles, you get a workspace that’s silent and cool—no matter how loud your machine runs.
Imagine a tiny closet with a roaring GPU, yet your desk remains peaceful—like a hidden fortress of sound. That’s the power of knowing where and how to treat your space. Your best move? Stop fighting reflections and heat. Instead, move your rig—and your noise worries—out of sight.